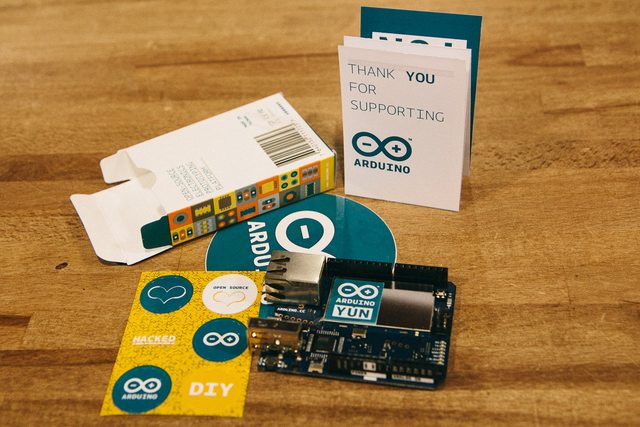
I am delighted to welcome Stefano Guglielmetti who, together with other Arduino friends/supporters, accepted to start experimenting with Arduino Yun and write a blog post to present some hands-on results. Starting today we are going to host a series of guest bloggers exploring different unique features of our new board.
Stefano, has more than 16 years of experience in the Internet industry, working both with small companies and start-ups up to very big and complex environments. His post below was orginally published at this link.
————-
Finally!!! Finally I put my hands on a brand new Arduino Yún. I’ve been waiting for this a long, loooong time. I’ve been playing with Arduino since the “diecimila” model came out and I, as a lot of people, always suffered the lack of connectivity and of real computing power. I tried to solve some of these problems using RaspberryPi and/or Electric Imp, but I always missed the Arduino approach… easy, lots of shields and Arduino ready parts, a lot of documentation, a strong community and the freedom of Open Source.
Now one of my dreams came true, and every time I go deeper into the discovery of the Yún’s capabilities, I find something amazing, very smart and very well done.
I won’t describe the platform itself, as many articles talking about that are already published and there will be many more to come. I’ll start directly with a real life example, in just a few hours I finally built something really, really useful to me, something I already built several times in various ways but none of which really satisfied me.
The task is pretty simple, and I believe it will be very useful to many people: I need to be alerted in real time when I receive some important emails. Not all the emails: we provide customer care for many clients, with different SLAs, and I need to be alerted only for the most important ones. Moreover, sometimes I look forward to receiving a precise email… a shipment confirmation, a mail from a special someone… I need something flexible, eye catching, that doesn’t depend on my computer or my cellphone (that always has only 1% battery)
So I decided to build a GMail Lamp and Arduino Yún was the perfect choice (and now that I built it, I can confirm that. It is perfect)
The working principle is very straightforward: On GMail, I defined a new label, so I can quickly change the rules for the messages that will go under it, then I tell to Arduino Yún which label to watch for (via REST APIs… amazing) and that’s it! The lamp (actually only just a led, the lamp will come in the future) turns on every time I get new messages under that label. It’s the bat-signal principle!
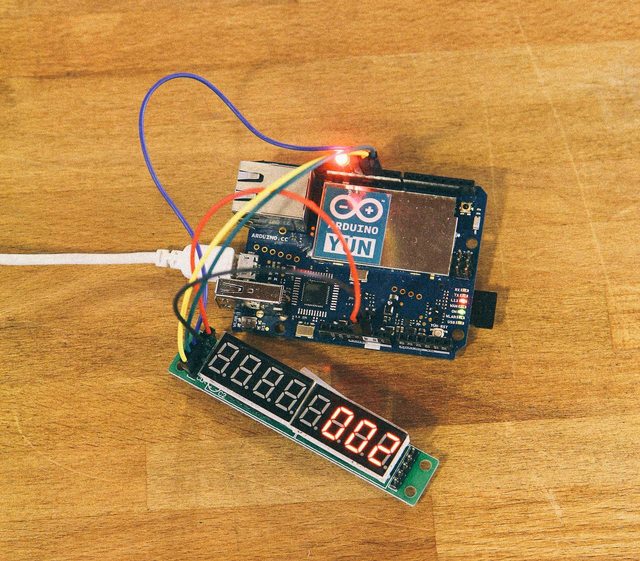
Okay, now let’s get a bit more technical… how did I do it?
The hardware
- An Arduino Yún, and it must be connected to the internet.
- A LED (or a relay if you want to turn on a real lamp, as I will do in the future)
This is the connection scheme (supersimple)
The LED goes on Digital Pin 13
The LED Display uses pins 10,11,12 and, obviously, GND and +5V
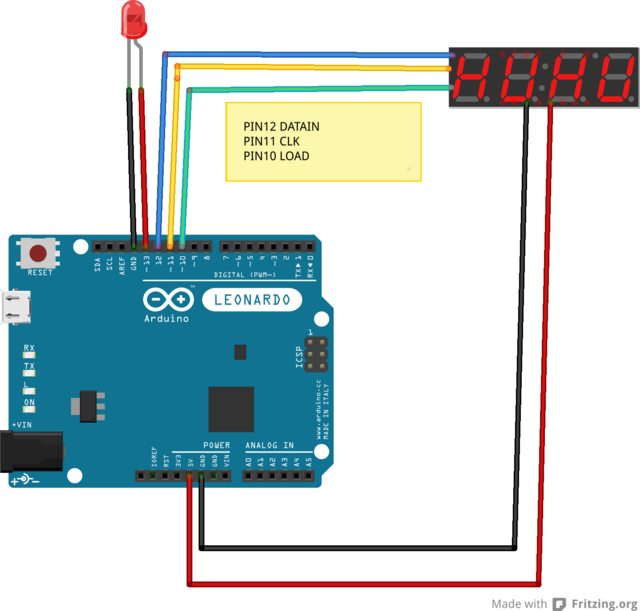
Ok, the hardware is ready. When you will program the Yún for the first time, even if you can program it over the wifi network, I suggest you use the serial port via USB because it’s faster and I still use the serial port to debug (even if you have a brand new Console object 
Now, the Code
Even if it’s short, I think it’s very interesting because I used many new features of the Yún. I’m not going to describe all the code, that you can freely download or fork from GitHub (https://github.com/amicojeko/
Let’s start from the beginning
#include
With the Process library, you can run some code on the Linux side of the Yún and catch the stdout on Arduino. It’s amazing because you can delegate to Linux all the dirty jobs and the heavy computing. In this case, I use the Linux “curl” command to get the ATOM feed of my label from GMail.
The Process library also includes the Bridge library, that allows you to pass information between the two sides of the Yún (Linux and Arduino) using a key/value pairing. And it gives you the power of REST APIs, I use it to configure the label to observe.
#include
With this library, you can use the inernal memory or a micro SD card/USB key for storage. All these features are native on the Yún!
#include "LedControl.h"
/* Downloaded From http://playground.arduino.cc/Main/LedControl */
I use this library to control the 7 segment LED Display
const int ledPin = 13;
I’ve used the pin 13 for the led. As I told you before, you can replace the LED with a relay in order to turn on and off a real lamp!
const char* settings_file = "/root/gmail_settings\0";
/* This is the settings file */
I’m saving under “/root” cause /tmp and /var will be erased at every reboot.
Bridge.get("label", labelbuffer, 256);This is a supercool line of code that uses an übercool Yún’s feature. I’m telling Arduino to listen for a REST call on the URL http://arduino.local/data/put/
When I get some data, it will put the value of LABEL in the localbuffer. The localbuffer was initialized like that
char labelbuffer[256];
That means that you can actually talk with your Arduino while it runs projects! You can get or put variables, you can finally make dynamic projects! I used it to tell Arduino which label to observe, but I can, and I will go further, I promise.
label = String(labelbuffer);
File settings = FileSystem.open(settings_file, FILE_WRITE);
settings.print(label);
settings.close();
This is cool too. Using the FileIO object, I save the label in a local file on the Linux side of Arduino, so when I will turn it off and on again, It will remember my settings.
File settings = FileSystem.open(settings_file, FILE_READ);
while (settings.available() > 0){
 char c = settings.read();
 label += c;
}
settings.close();
This is how I read a file from the filesystem.
Process p;

p.runShellCommand("curl -u " + username + ":" + password + "
\"https://mail.google.com/mail/feed/atom/" + label + "\" -k --silent |grep -o \"
[0-9]*fullcount>\" |grep -o \"[0-9]*\"");

while(p.running()); // do nothing until the process finishes, so you get the whole output
int result = p.parseInt();
This is another bit of Yún’s magic. I run the curl command to get the ATOM feed of a specific label, and then I parse it with the grep command, and finally I get the number of unread messages for that label. Even if on the Yún’s Linux stack there are both Python and Lua, I thought that this solution was the most simple and stupid, and I love to KISS.
That’s it, now i just have to turn the LED on and to display the number of unread messages on the LED Display…
In a single day I learned how to use the Bridge library to get data from REST webservices, how to save and load data from the Linux filesystem, and how to run processes on the Linux side and get the STDOUT results. I already knew how to use the LED Display but I hope that someone learned something new even about that
Now I will build the actual lamp, improving both the Hardware and the Software sides, I will make it gorgeous and fully configurable, and I will keep you informed about that!
Cheers to everybody and happy hacking!
——
Text and pictures by Stefano Guglielmetti
View the Original article